 TellPip
Connected sources: folders, Notion, Google Drive and Microsoft
Let Pip answer from your whole knowledge base, synced and searched on your computer. Included in the Enterprise plan.
Updated 30 October 2026
Contents
What connected sources are
Reference files are perfect for the documents you use most. When your knowledge lives in a whole folder, in Notion, in Google Drive, in OneDrive or in SharePoint, connected sources let Pip answer from everything you know: the company wiki, procedures, past proposals, the notes folder you have been building up for years.
Connected sources are TellPip's company knowledge base, included in the Enterprise plan and shared with your team. Everything is synced, indexed and searched on your computer. To put search results in order, the most relevant passages may be sent to our server.
Connecting happens in two simple, separate places:
- the Connectors, in Settings, where you connect your Notion, Google and Microsoft accounts once and for all;
- the Connected sources page, in TellPip's main window, where you choose what Pip should read and for which modes.
Connect your accounts: the Connectors
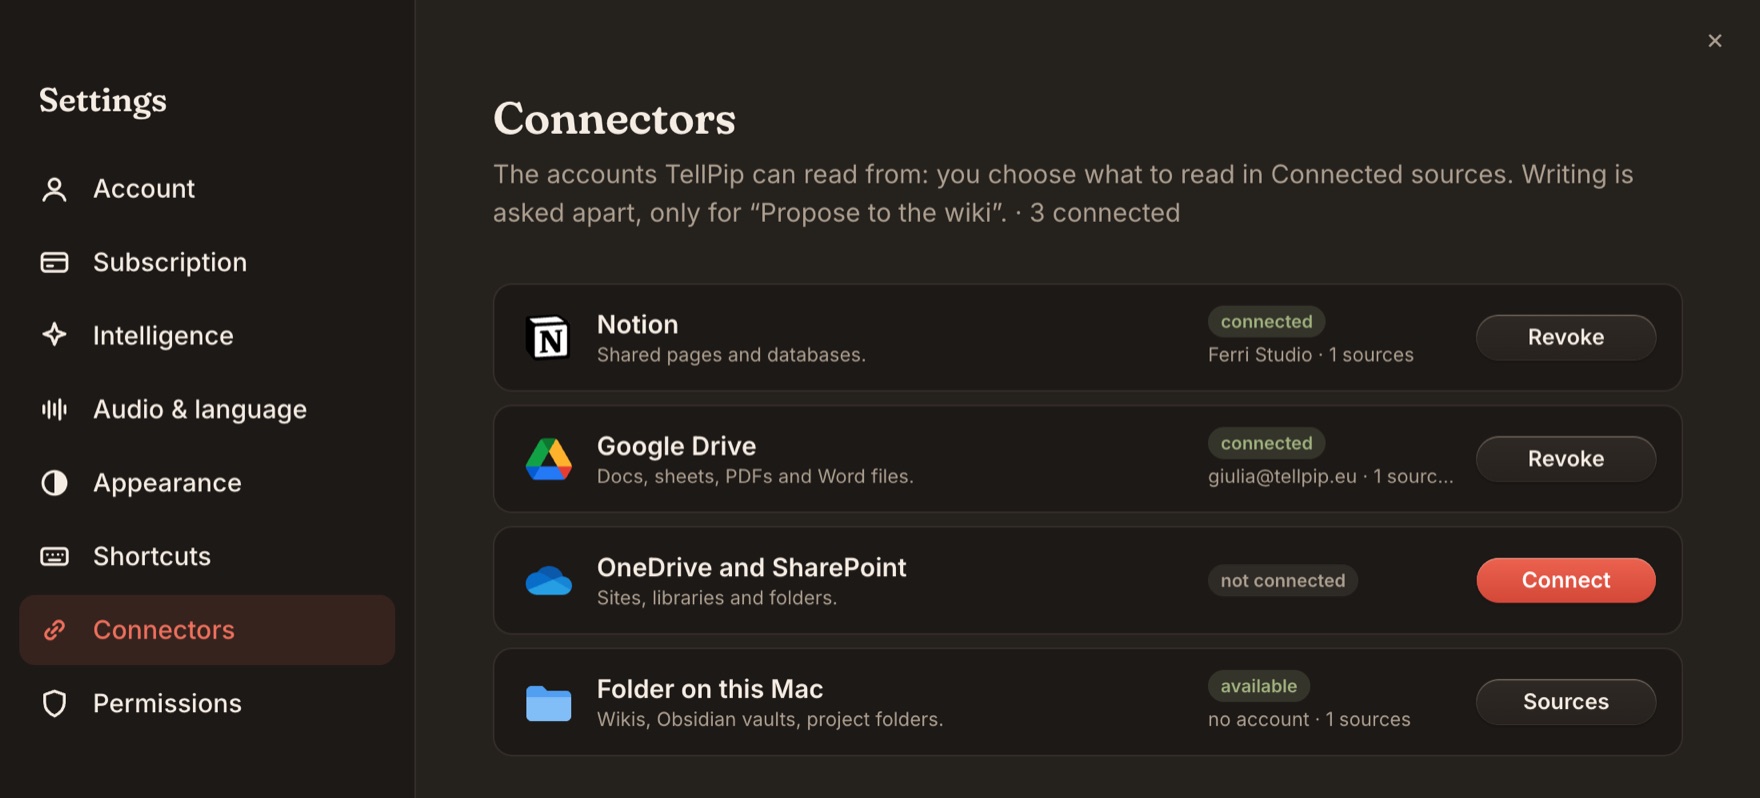
- Open Settings and choose the Connectors tab.
- Next to Notion, Google or Microsoft, click Connect: your browser opens, sign in with your account and allow TellPip to read your content.
- Back in TellPip, the connector shows as connected and ready for your sources.
From here you manage your accounts at any time: Reconnect refreshes the authorisation in one click, Revoke withdraws it whenever you like.
Add a source in four steps
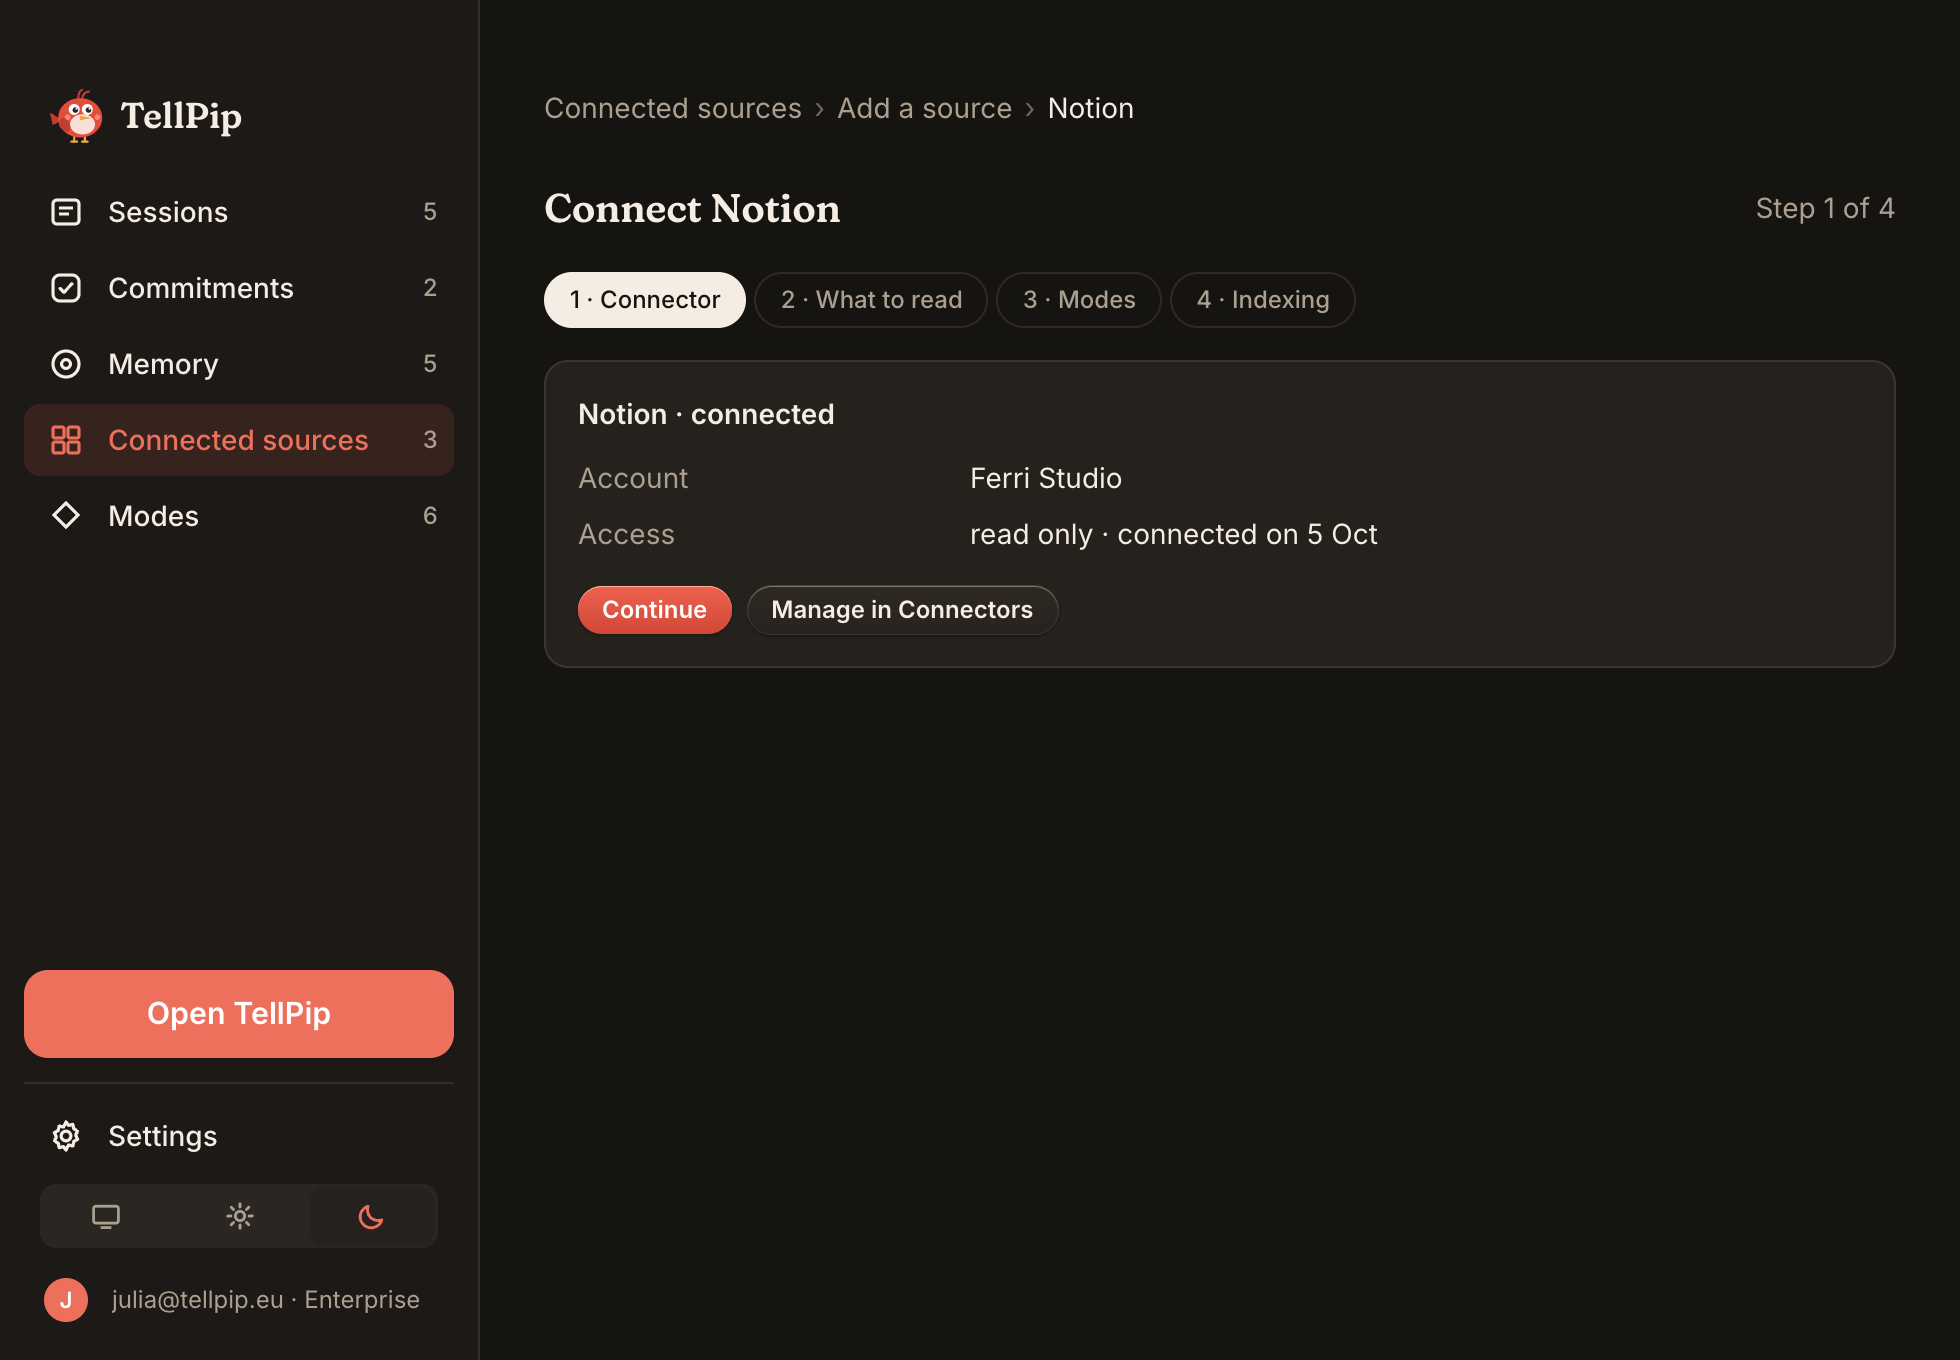
Open the main window with ⌘ ⇧ T and select Connected sources in the sidebar. A guided setup takes you through four steps:
- Connector: choose where to read from, a folder on your computer, Notion, Google Drive, OneDrive or SharePoint.
- What to read: point to the content Pip should look at.
- Modes: choose which modes the source is available in. A sales mode, for example, doesn't need the HR procedures: that way every answer stays focused.
- Indexing: TellPip reads and indexes the content on your computer, and the source is ready for your next question.
A folder on your computer
Connect a folder and choose the subfolders to read and the ones to leave out, like drafts or personal archives. Pip looks at the text and Markdown files in the folder: the ideal format for wikis, procedures and notes, tidy and always easy to update.
TellPip follows the folder automatically: new and changed files are read on their own, without you doing anything. The files stay exactly where they are.
The folder on your computer is also the home of your wiki: this is where TellPip saves the pages you approve with Propose to the wiki after a call. See Notes, transcript and follow-up email.
Notion
With the Notion connector connected, choose the pages and spaces Pip should read: subpages are included, so pointing to the top-level page is usually enough. TellPip reads your content without ever changing it.
Pages are synced to your computer and kept up to date automatically. Searching happens on your computer, exactly as for your files, including by meaning thanks to the local model.
Google Drive
With the Google connector connected, choose what to read:
- the whole Drive, to have every document at hand;
- or just some folders: paste a folder's link, then add the others one at a time.
Pip reads Google Docs, Sheets and Slides, as well as PDF and Word files. As with Notion, the content is synced to your computer, searched there and kept up to date automatically.
OneDrive and SharePoint
With the Microsoft connector connected, Pip draws on your OneDrive documents and on the libraries of your team's SharePoint sites: choose which documents and which sites to read, and your company's knowledge base is just a question away.
As with Notion and Google Drive, the content is synced to your computer, searched there and kept up to date automatically.
Manage your sources
- Used by modes: change at any time which modes can search the source.
- Link to Memory: join the source to your client memory. On a person's or a company's card the From the wiki box appears, with the description from their page, and Pip also uses it in the reminder it shows you in the call. See Client memory.
- Update now: sync the source instantly, for example after an important change in Notion.
- Disconnect: remove the source and its copy from TellPip in one click.
Ask the knowledge base
Pip searches your sources on its own whenever a question needs them. When a source is connected, the chat field reminds you that you can type @wiki: put it before your question to point Pip straight at the knowledge base. Answers that use it carry the @wiki tag, so you always know where the information comes from.
For example: "@wiki what is the procedure for opening a new case file?". Pip answers from your procedures, in the words of your documents.
Keep your sources in line
- If you move or rename a connected folder, or keep it on an external disk, reconnect the disk or connect the folder again: TellPip picks it up again straight away.
- For Notion, Google and Microsoft, open Settings → Connectors and click Reconnect: the authorisation is refreshed and syncing restarts automatically.
- For Notion, check that the pages you want are among those chosen for the source.
- After an important change in your content, use Update now to have it available straight away.
Cosa sono le fonti collegate
I file di riferimento sono perfetti per i documenti che usi più spesso. Quando le tue conoscenze vivono in un’intera cartella, in Notion, in Google Drive, in OneDrive o in SharePoint, le fonti collegate permettono a Pip di rispondere da tutto il tuo patrimonio di conoscenza: la wiki aziendale, le procedure, le offerte passate, la cartella di appunti che arricchisci da anni.
Le fonti collegate sono la knowledge base aziendale di TellPip, inclusa nel piano Enterprise e condivisa con il tuo team. Tutto viene sincronizzato, indicizzato e consultato sul tuo computer. Per mettere in ordine i risultati della ricerca, i passaggi più pertinenti possono essere inviati al nostro server.
Il collegamento avviene in due momenti, semplici e distinti:
- i Connettori, nelle Impostazioni, dove colleghi una volta per tutte i tuoi account Notion, Google e Microsoft;
- la pagina Fonti collegate, nella finestra principale di TellPip, dove scegli cosa Pip deve leggere e per quali modalità.
Collega i tuoi account: i Connettori
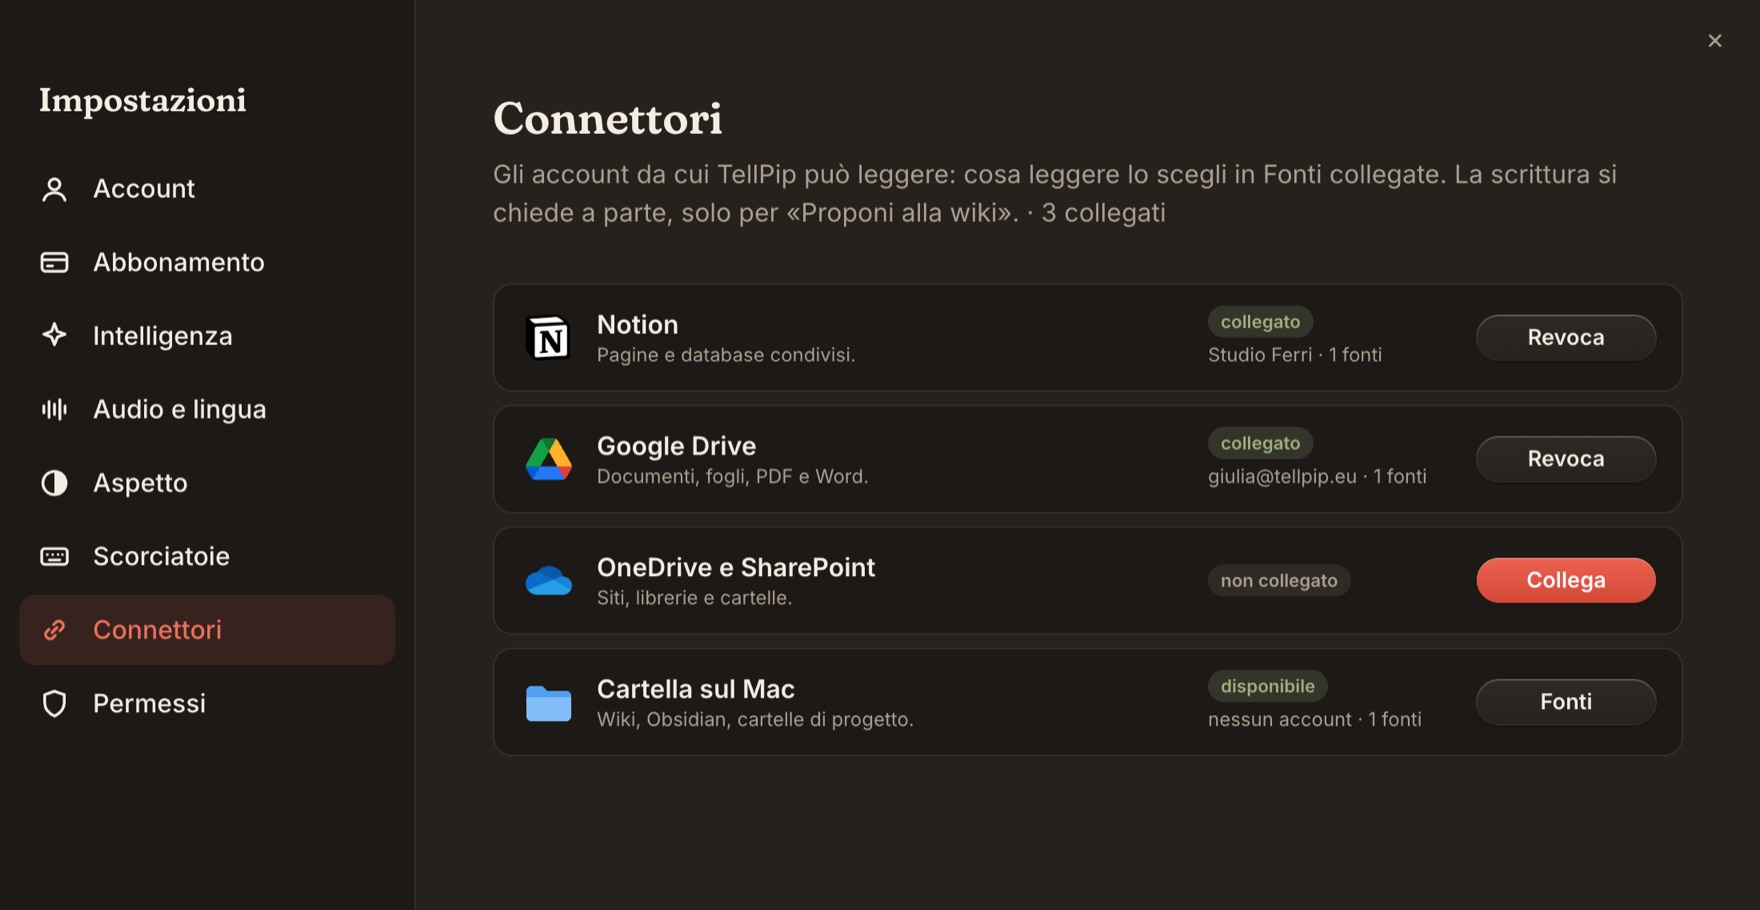
- Apri le Impostazioni e scegli la scheda Connettori.
- Accanto a Notion, a Google o a Microsoft, clicca Collega: si apre il browser, accedi con il tuo account e consenti a TellPip la lettura dei contenuti.
- Tornato in TellPip, il connettore risulta collegato e pronto per le tue fonti.
Da qui gestisci i tuoi account in ogni momento: Ricollega aggiorna l’autorizzazione con un clic, Revoca la ritira quando lo desideri.
Aggiungi una fonte in quattro passi
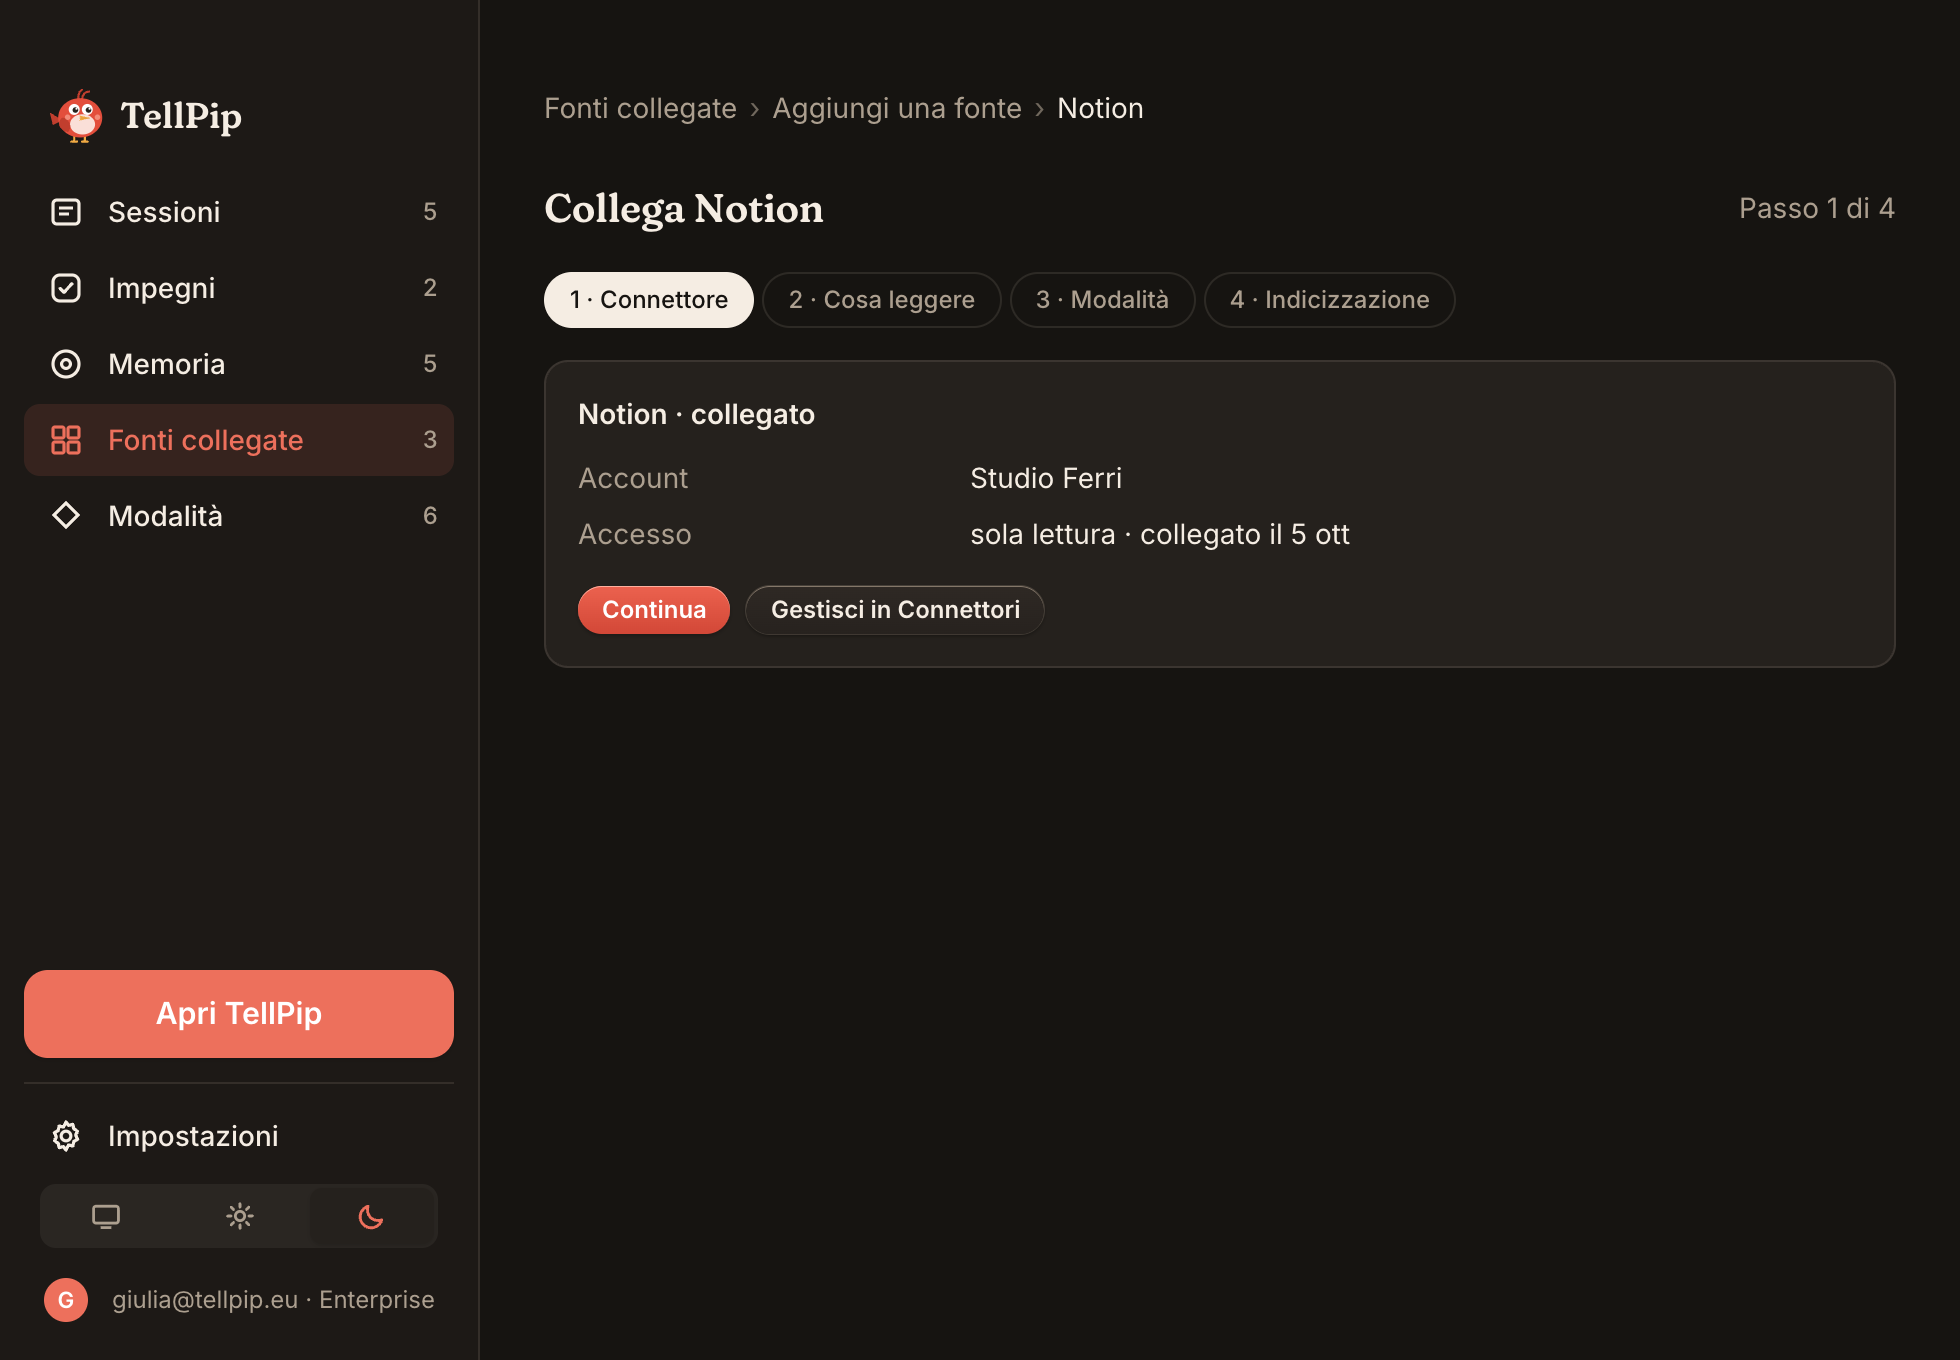
Apri la finestra principale con ⌘ ⇧ T e seleziona Fonti collegate nella barra laterale. Una procedura guidata ti accompagna in quattro passi:
- Connettore: scegli da dove leggere, una cartella del tuo computer, Notion, Google Drive, OneDrive o SharePoint.
- Cosa leggere: indica i contenuti che Pip deve consultare.
- Modalità: scegli in quali modalità la fonte è disponibile. Una modalità di vendita, per esempio, non ha bisogno delle procedure HR: così ogni risposta resta mirata.
- Indicizzazione: TellPip legge e indicizza i contenuti sul tuo computer, e la fonte è pronta per la prossima domanda.
Una cartella del computer
Collega una cartella e scegli le sottocartelle da leggere e quelle da escludere, come bozze o archivi personali. Pip consulta i file di testo e Markdown della cartella: il formato ideale per wiki, procedure e appunti, ordinati e sempre aggiornabili.
TellPip segue la cartella in automatico: i file nuovi o modificati vengono letti da soli, senza che tu debba fare nulla. I file restano esattamente dove sono.
La cartella sul computer è anche la casa della tua wiki: è qui che TellPip salva le pagine che approvi con Proponi alla wiki dopo una call. Vedi Note, trascrizione ed email di follow-up.
Notion
Con il connettore Notion collegato, scegli le pagine e gli spazi che Pip deve leggere: le sottopagine sono incluse, quindi di norma basta indicare la pagina principale. TellPip legge i tuoi contenuti senza mai modificarli.
Le pagine vengono sincronizzate sul tuo computer e mantenute aggiornate in automatico. La ricerca avviene sul tuo computer, esattamente come per i tuoi file, anche per significato grazie al modello locale.
Google Drive
Con il connettore Google collegato, scegli cosa leggere:
- tutto il Drive, per avere a disposizione ogni documento;
- oppure solo alcune cartelle: incolla il link di una cartella, poi aggiungi le altre una alla volta.
Pip legge Google Docs, Fogli e Presentazioni, oltre ai file PDF e Word. Come per Notion, i contenuti vengono sincronizzati sul tuo computer, consultati lì e mantenuti aggiornati in automatico.
OneDrive e SharePoint
Con il connettore Microsoft collegato, Pip attinge ai tuoi documenti di OneDrive e alle raccolte dei siti SharePoint del tuo team: scegli quali documenti e quali siti leggere, e la knowledge base della tua azienda diventa subito a portata di domanda.
Come per Notion e Google Drive, i contenuti vengono sincronizzati sul tuo computer, consultati lì e mantenuti aggiornati in automatico.
Gestisci le tue fonti
- Usata dalle modalità: cambia in qualsiasi momento le modalità che possono consultare la fonte.
- Collega alla Memoria: unisci la fonte alla memoria dei clienti. Nella scheda di una persona o di un’azienda compare il riquadro Dalla wiki, con la descrizione della sua pagina, e Pip la usa anche nel promemoria che ti mostra in call. Vedi Memoria dei clienti.
- Aggiorna ora: sincronizza la fonte all’istante, per esempio dopo una modifica importante in Notion.
- Scollega: rimuovi la fonte e la sua copia da TellPip con un clic.
Chiedi alla knowledge base
Pip consulta le tue fonti in autonomia ogni volta che una domanda ne ha bisogno. Quando c’è una fonte collegata, il campo della chat ti ricorda che puoi scrivere @wiki: aggiungilo prima della domanda per indirizzare Pip direttamente sulla knowledge base. Le risposte che la utilizzano portano l’etichetta @wiki, così sai sempre da dove arriva l’informazione.
Per esempio: «@wiki qual è la procedura per l’apertura di una nuova pratica?». Pip risponde dalle tue procedure, con le parole dei tuoi documenti.
Mantieni le fonti sempre allineate
- Se sposti o rinomini una cartella collegata, o la tieni su un disco esterno, ricollega il disco oppure collega di nuovo la cartella: TellPip riprende subito a seguirla.
- Per Notion, Google e Microsoft, apri Impostazioni → Connettori e clicca Ricollega: l’autorizzazione si aggiorna e la sincronizzazione riparte in automatico.
- Per Notion, verifica che le pagine che desideri siano tra quelle scelte per la fonte.
- Dopo una modifica importante nei tuoi contenuti, usa Aggiorna ora per averla subito a disposizione.
Related articles
Need anything else? We’re here for you.
Write to us