 TellPip
A tour of TellPip
The bar, the chat, the main window, Settings and the menu-bar icon: everything you need, always at hand.
Updated 30 October 2026
Contents
TellPip is made of a few essential pieces, designed to stay discreet and let you focus on the call: a bar at the top of the screen, a chat that opens when you need it, a main window for sessions, memory, sources and modes, Settings and an icon in the menu bar. In this guide you’ll see what each one does and how to get the most out of it.
The bar
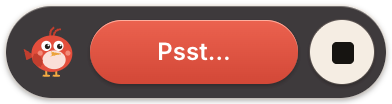
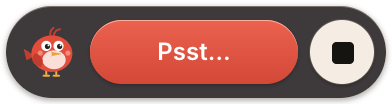
The small bar at the top of your screen is your starting point, minimal by design:
- Pip, to grab the bar and move it.
- Psst…, which opens the chat and starts listening. When the chat is open, the button reads Hide.
TellPip is ready to listen as soon as you open it: opening the chat starts listening to the call.
Move the bar
You can place the bar wherever you like by dragging it, or move it precisely with ⌘ + arrow keys.
The chat
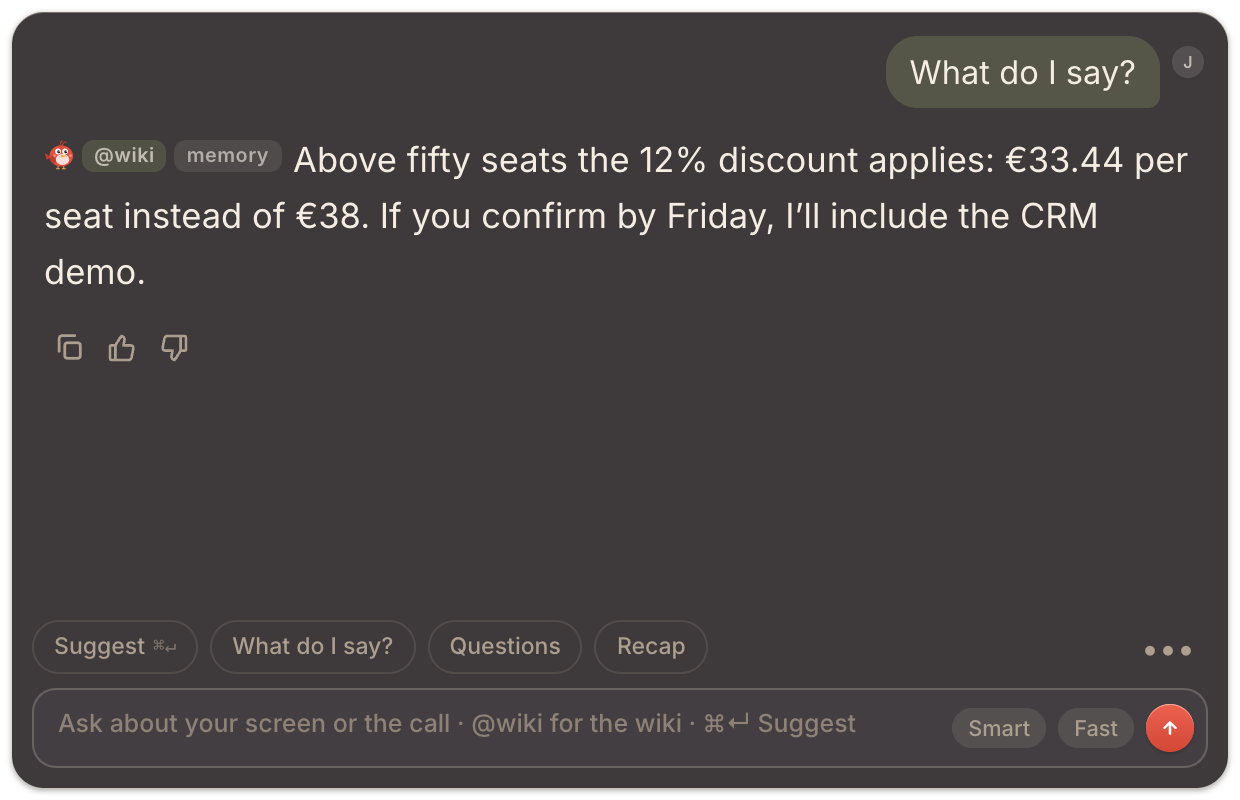
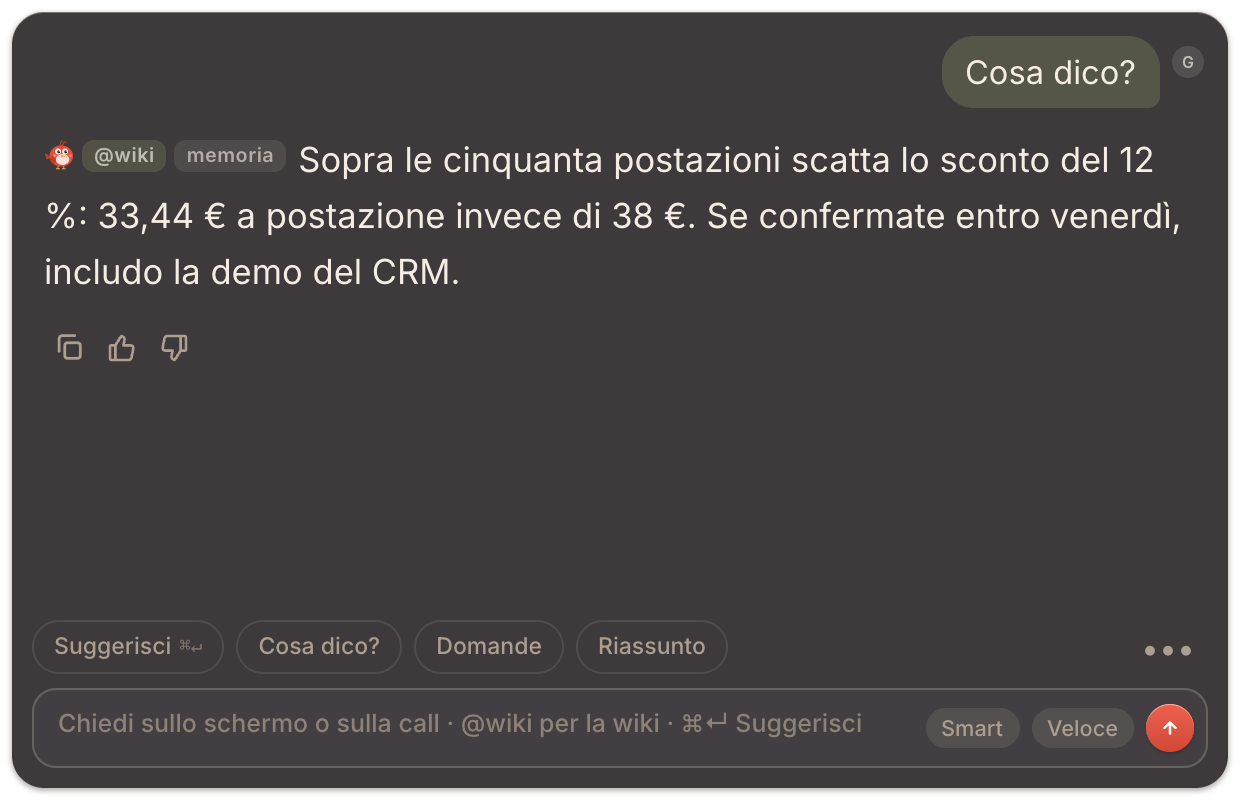
The chat is the space where Pip answers you. It opens next to the bar with Psst… or with ⌘\.
- Quick actions at the bottom, above the input field: Suggest, What do I say?, Questions, Recap. One click, and the answer arrives. See Ask Pip during a call.
- The input field, to type any question about the screen, your documents or the conversation; press ↵ to send it.
- Smart and Fast: Smart thinks harder for the questions that matter, Fast answers as quickly as possible. You can turn on one at a time; when both are off, Pip decides by itself how much to think, based on the question.
- Send and Stop: Stop interrupts an answer while it’s being written.
Every answer has a Copy answer button. Some answers carry a small tag that shows their source: memory when Pip used what it remembers about a client, @wiki when it looked in your company knowledge base. Under an answer a Note box may also appear, with an observation from Pip that’s useful for the call. When Pip looks at your screen, a Saw the screen thumbnail appears for an instant.
You can resize the chat by dragging its edges, to fit the way you work.
The ••• menu
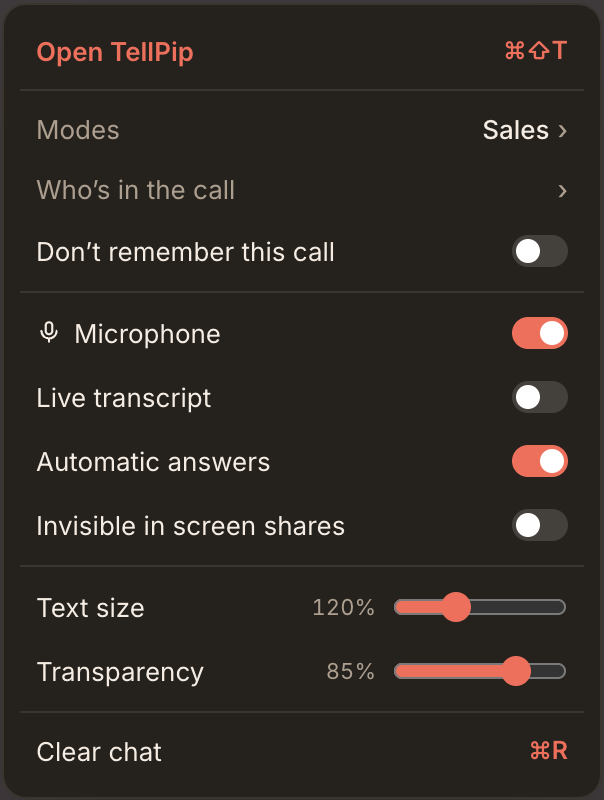
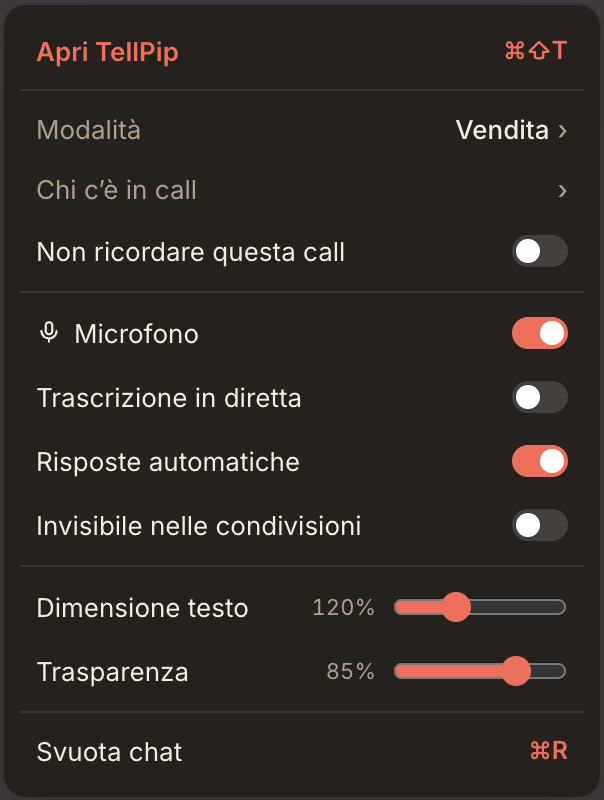
The ••• button in the chat holds everything you may want to adjust during a call:
- Open TellPip: opens the main window.
- Modes: switch to another mode.
- During a call: Who’s in the call and Don’t remember this call.
- Live transcript: shows the transcript while the call is going on.
- Automatic answers: Pip answers by itself when someone asks you a question.
- Invisible: keeps TellPip out of screen sharing and recordings.
- Sliders for Text size and Transparency.
- Clear chat (⌘R).
The main window
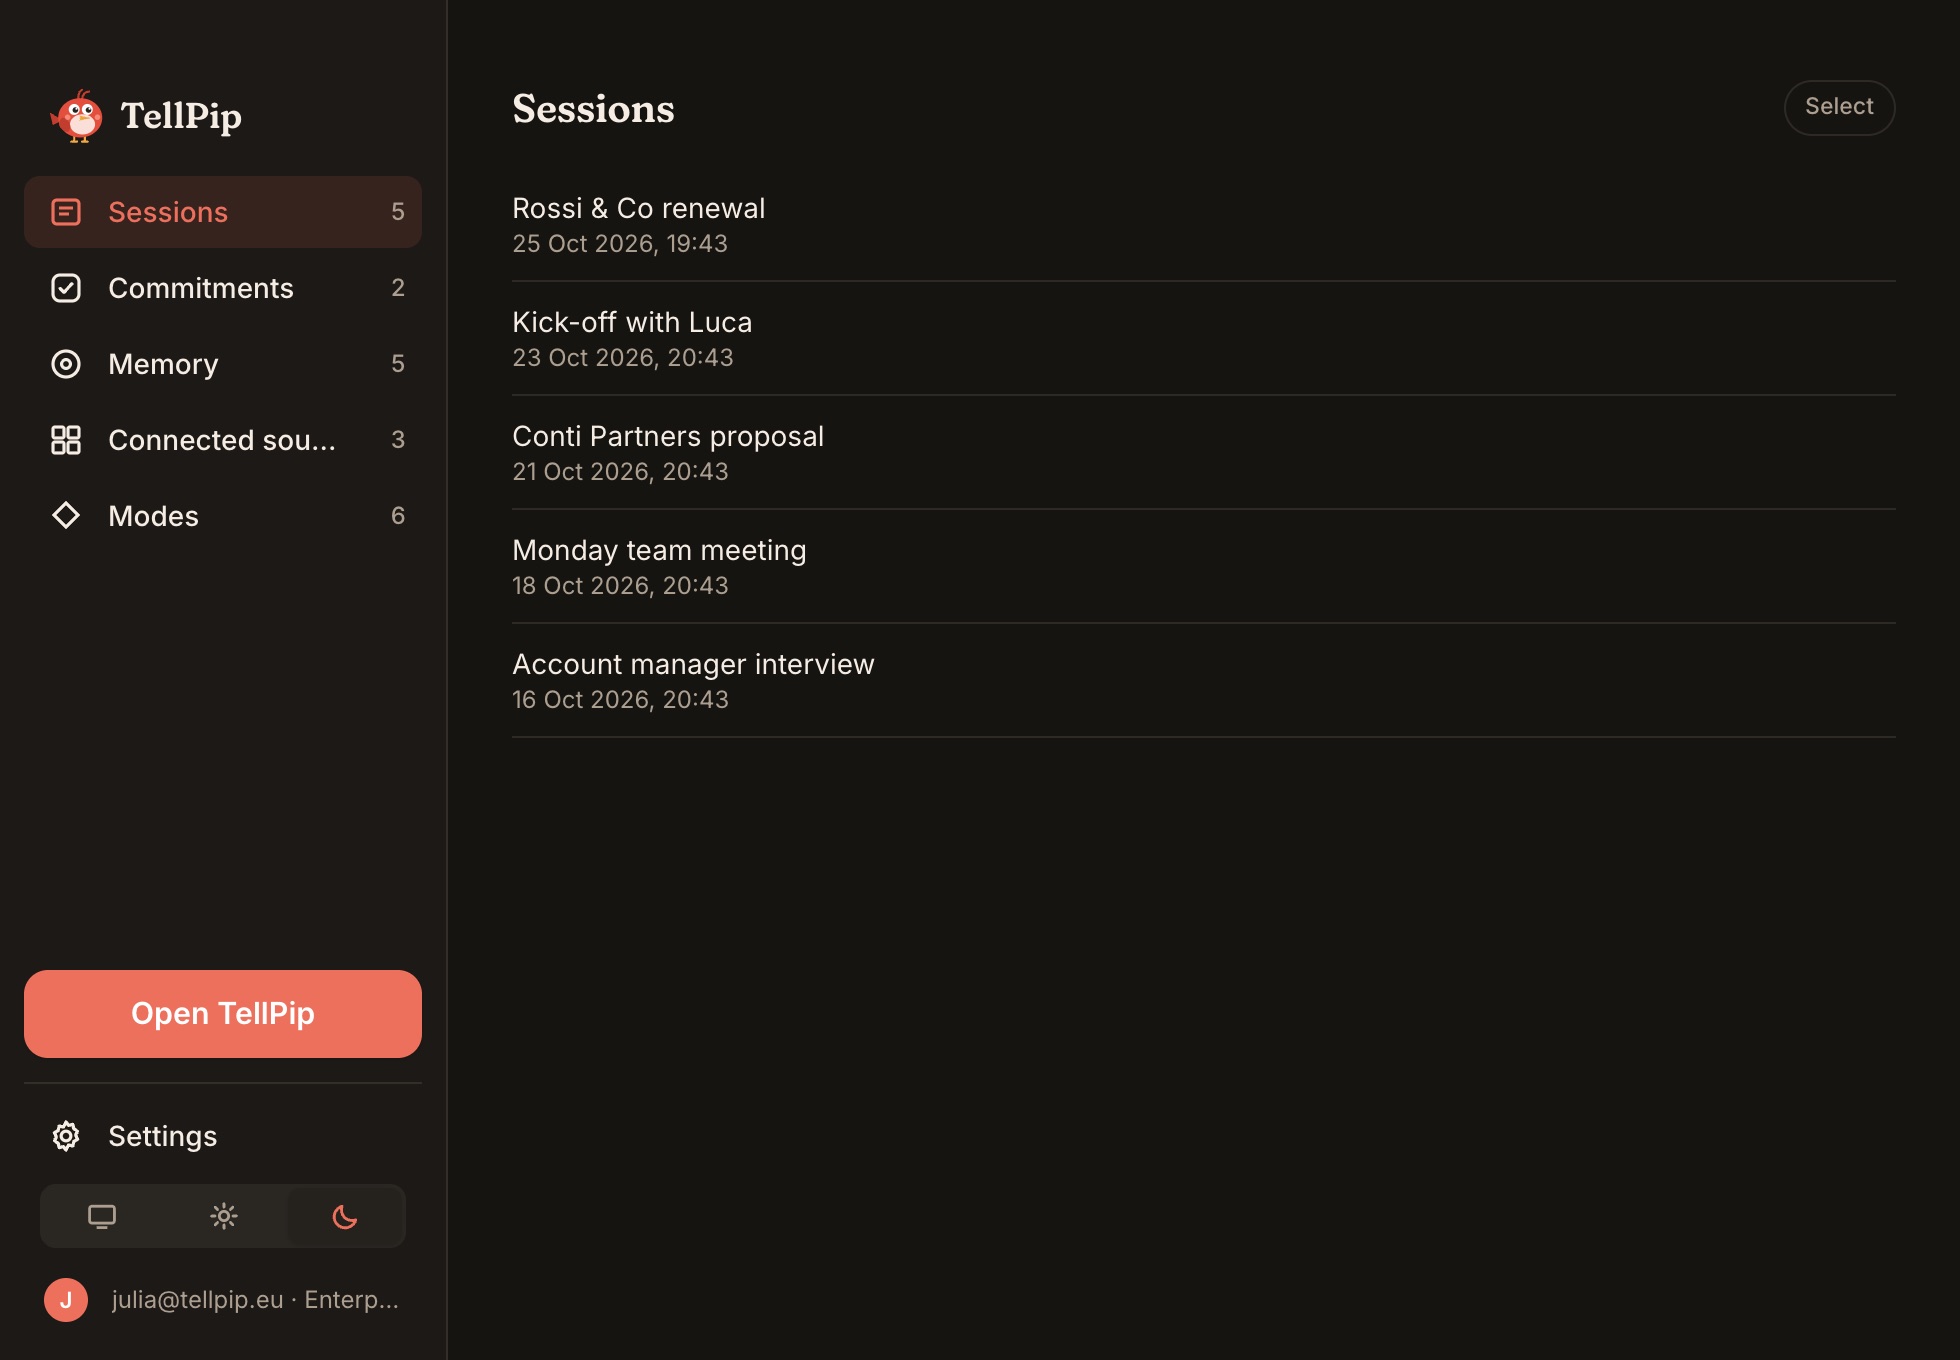
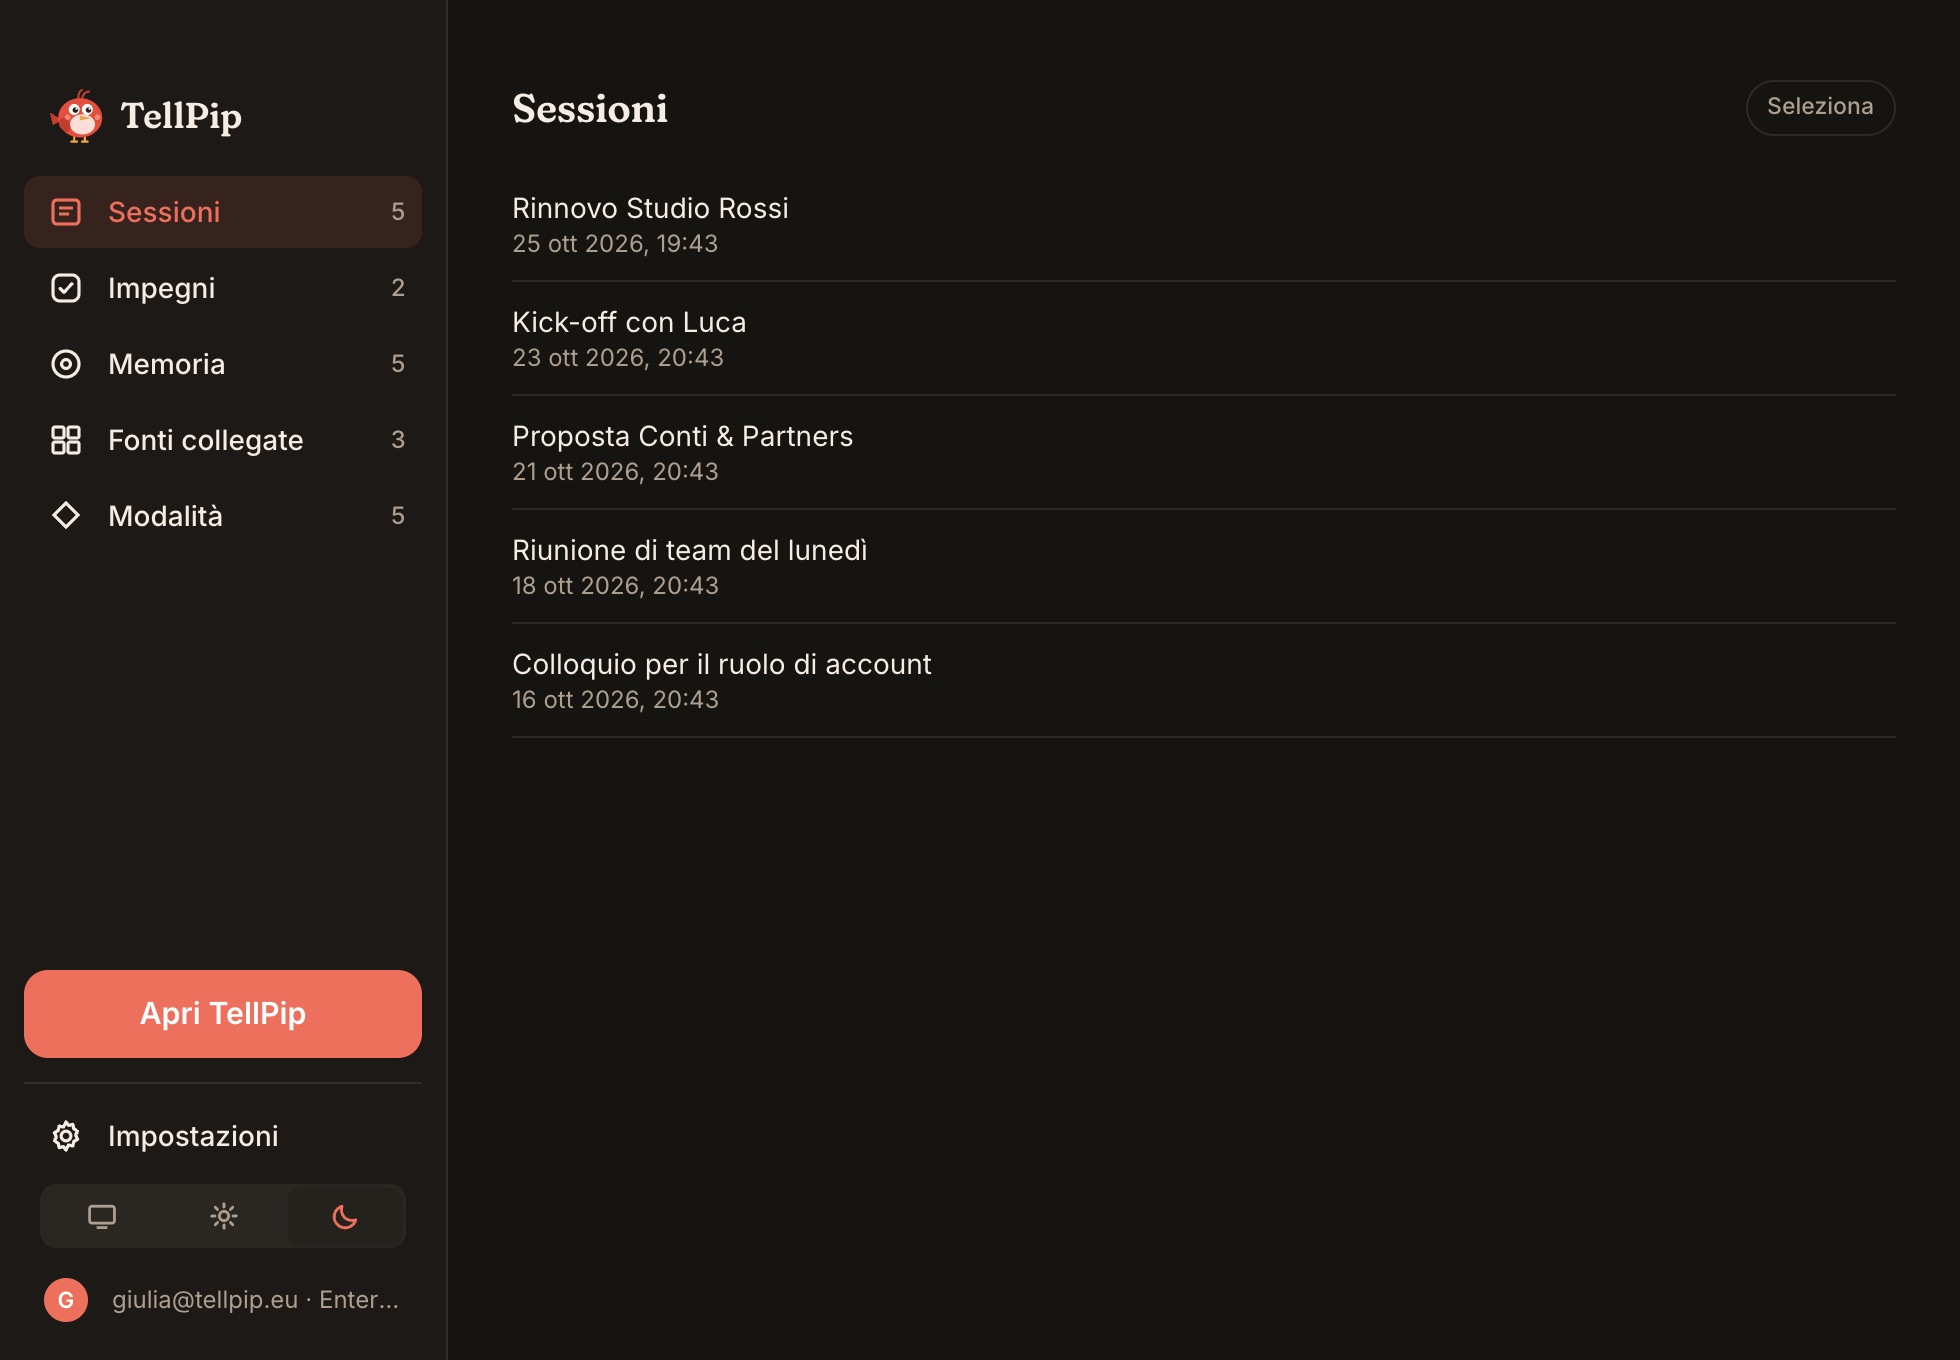
The main window is home to everything TellPip keeps for you. You open it with ⌘⇧T (Open TellPip), from the chat’s ••• menu or from the menu-bar icon. The sidebar takes you to four pages:
- Sessions: your calls, with notes, transcript and follow-up email. See Notes, transcript and follow-up email.
- Memory: what Pip remembers about your clients. See Client memory.
- Connected sources: the company knowledge base. See Connected sources.
- Modes: your modes, with instructions, documents and note templates. See Modes.
When a call ends, the main window opens straight on its session, with the notes being prepared.
Settings
Settings opens as a sheet over the main window and is organised in tabs:
- Account: your names in calls, how you sign in and the computers you use.
- Subscription: your plan, prices, payments and invitations.
- Intelligence: Smart, Use the screen, real-time answers.
- Audio & language: local models, App language, vocabulary.
- Appearance: light, dark or same-as-system theme, text size, panel opacity, chat size, invisibility and Don’t steal focus when invisible.
- Shortcuts: every keyboard combination.
- Connectors: your Notion, Google and Microsoft accounts, to connect, renew or revoke.
- Permissions: the status of the macOS permissions.
About TellPip
In the TellPip menu, About TellPip opens a window of its own. From here you can:
- Check for updates: TellPip already updates itself, checking for updates at launch and during the day, downloading them in the background and installing them when you quit the app or press Restart to update. Never during a call.
- Contact support: describe your question and send it. With See what we send you first check the technical report that goes with the message: your computer’s model, the app version, the permissions, the local models and the app’s latest events. Never transcripts, notes or documents. The message reaches our support team and you get an email with a reference number.
The menu-bar icon
TellPip also has an icon in the Mac’s menu bar, at the top right. From there, with a single click, you can:
- Start session or End session;
- Show chat or Hide chat;
- turn invisibility on or off;
- open Past sessions and Settings…;
- Quit TellPip.
Next steps
Discover the keyboard shortcuts, then try your first call.
TellPip è composto da pochi elementi essenziali, pensati per restare discreti e lasciarti concentrare sulla call: una barra in cima allo schermo, una chat che si apre quando serve, una finestra principale per sessioni, memoria, fonti e modalità, le Impostazioni e un’icona nella barra dei menu. In questa guida scopri cosa fa ciascuno e come usarlo al meglio.
La barra
La piccola barra in cima allo schermo è il tuo punto di partenza, essenziale per scelta:
- Pip, per prendere la barra e spostarla.
- Psst…, che apre la chat e avvia l’ascolto. Quando la chat è aperta, il pulsante diventa Nascondi.
TellPip è pronto ad ascoltare non appena lo apri: aprire la chat avvia l’ascolto della call.
Sposta la barra
Puoi posizionare la barra dove preferisci trascinandola, oppure spostarla con precisione con ⌘ + le frecce.
La chat
La chat è lo spazio in cui Pip ti risponde. Si apre accanto alla barra con Psst… o con ⌘\.
- Le azioni rapide in basso, sopra il campo di scrittura: Suggerisci, Cosa dico?, Domande, Riassunto. Un clic, e la risposta arriva. Vedi Chiedi a Pip durante una call.
- Il campo di testo, per scrivere qualsiasi domanda sullo schermo, sui documenti o sulla conversazione; premi ↵ per inviarla.
- Smart e Veloce: Smart ragiona più a fondo per le domande decisive, Veloce risponde con la massima immediatezza. Puoi attivarne uno alla volta; quando sono entrambi spenti, Pip decide da solo quanto ragionare in base alla domanda.
- Invia e Stop: Stop interrompe una risposta mentre viene scritta.
Ogni risposta ha il pulsante Copia risposta. Alcune risposte portano una piccola etichetta che ne indica la fonte: memoria quando Pip ha usato ciò che ricorda di un cliente, @wiki quando ha consultato la knowledge base aziendale. Sotto una risposta può comparire anche il riquadro Nota, con un’osservazione di Pip utile per la call. Quando Pip osserva lo schermo, per un istante compare la miniatura Ha visto lo schermo.
Puoi ridimensionare la chat trascinandone i bordi, per adattarla al tuo modo di lavorare.
Il menu •••
Il pulsante ••• nella chat raccoglie tutto ciò che potresti voler regolare durante una call:
- Apri TellPip: apre la finestra principale.
- Modalità: passa a un’altra modalità.
- Durante una call: Chi c’è in call e Non ricordare questa call.
- Trascrizione in diretta: mostra la trascrizione mentre la call si svolge.
- Risposte automatiche: Pip risponde da solo quando qualcuno ti fa una domanda.
- Invisibile: tiene TellPip fuori dalla condivisione schermo e dalle registrazioni.
- Cursori per Dimensione testo e Trasparenza.
- Svuota chat (⌘R).
La finestra principale
La finestra principale è la casa di tutto ciò che TellPip conserva per te. La apri con ⌘⇧T (Apri TellPip), dal menu ••• della chat o dall’icona nella barra dei menu. La barra laterale ti porta in quattro pagine:
- Sessioni: le tue call, con note, trascrizione ed email di follow-up. Vedi Note, trascrizione ed email di follow-up.
- Memoria: ciò che Pip ricorda dei tuoi clienti. Vedi Memoria dei clienti.
- Fonti collegate: la knowledge base aziendale. Vedi Fonti collegate.
- Modalità: le tue modalità, con istruzioni, documenti e template delle note. Vedi Modalità.
Quando una call si conclude, la finestra principale si apre direttamente sulla sua sessione, con le note in preparazione.
Le Impostazioni
Le Impostazioni si aprono come un foglio sopra la finestra principale e sono organizzate in schede:
- Account: i tuoi nomi nelle call, come entri e i computer che usi.
- Abbonamento: il piano, i prezzi, i pagamenti e gli inviti.
- Intelligenza: Smart, Usa lo schermo, risposte in tempo reale.
- Audio e lingua: modelli locali, Lingua dell’app, vocabolario.
- Aspetto: tema chiaro, scuro o come il sistema, dimensione del testo, opacità del pannello, dimensione della chat, invisibilità e Non rubare il focus quando invisibile.
- Scorciatoie: tutte le combinazioni da tastiera.
- Connettori: i tuoi account Notion, Google e Microsoft, da collegare, rinnovare o revocare.
- Permessi: lo stato dei permessi di macOS.
Informazioni su TellPip
Dal menu TellPip, Informazioni su TellPip apre una finestra dedicata. Da qui puoi:
- Controlla aggiornamenti: TellPip si aggiorna già da solo, controllando le novità all’avvio e durante la giornata, scaricandole in sottofondo e installandole quando chiudi l’app o premi Riavvia per aggiornare. Mai durante una call.
- Contatta l’assistenza: descrivi la tua domanda e invia. Con Vedi cosa inviamo controlli prima il rapporto tecnico che accompagna il messaggio: il modello del computer, la versione dell’app, i permessi, i modelli locali e gli ultimi eventi dell’app. Mai trascrizioni, note o documenti. Il messaggio arriva al nostro team di assistenza e ricevi un’email con un numero di riferimento.
L’icona nella barra dei menu
TellPip ha anche un’icona nella barra dei menu del Mac, in alto a destra. Da lì puoi, con un solo clic:
- Avvia sessione o Termina sessione;
- Mostra chat o Nascondi chat;
- attivare o disattivare l’invisibilità;
- aprire Sessioni passate e Impostazioni…;
- Esci da TellPip.
I prossimi passi
Scopri le scorciatoie da tastiera, poi prova la tua prima call.
Related articles
Need anything else? We’re here for you.
Write to us