 TellPip
Your first call with TellPip
Start listening, ask Pip for help, end the call and get polished notes, ready to use.
Updated 30 October 2026
Contents
This guide walks you through a call from start to finish: what to set up beforehand, how to start listening, how to ask Pip for help and what happens when the call ends. It works exactly the same in Zoom, Google Meet, Microsoft Teams, Webex and any other app, because TellPip listens right from your computer and never joins the meeting: no bot, no invitation, no extra participant.
1. Before the call
- Check you’re signed in. Make sure you’re signed in and that your free trial or subscription is active: that’s what enables listening. See Install TellPip and sign in.
- Grant the permissions. Microphone, screen recording and system audio let TellPip hear you and the people you’re talking to. See macOS permissions.
- Pick the right mode. If you’ve set up a mode for this kind of call (a consultation, a sales call, a team meeting), select it in the chat’s ••• menu → Modes. Pip will use its instructions and documents, and the notes will follow its template.
2. Start the session
TellPip is ready to listen as soon as you open it. Join the call as you always do, then start the session the way you prefer:
- press Psst… on the bar, or ⌘\: the chat opens and listening starts;
- press ⌘⇧\, the shortcut that starts and ends the session;
- choose Start session from the menu-bar icon.
Pip welcomes you in the chat, confirming that it’s listening and can see your screen and the conversation. From this moment you’re ready.
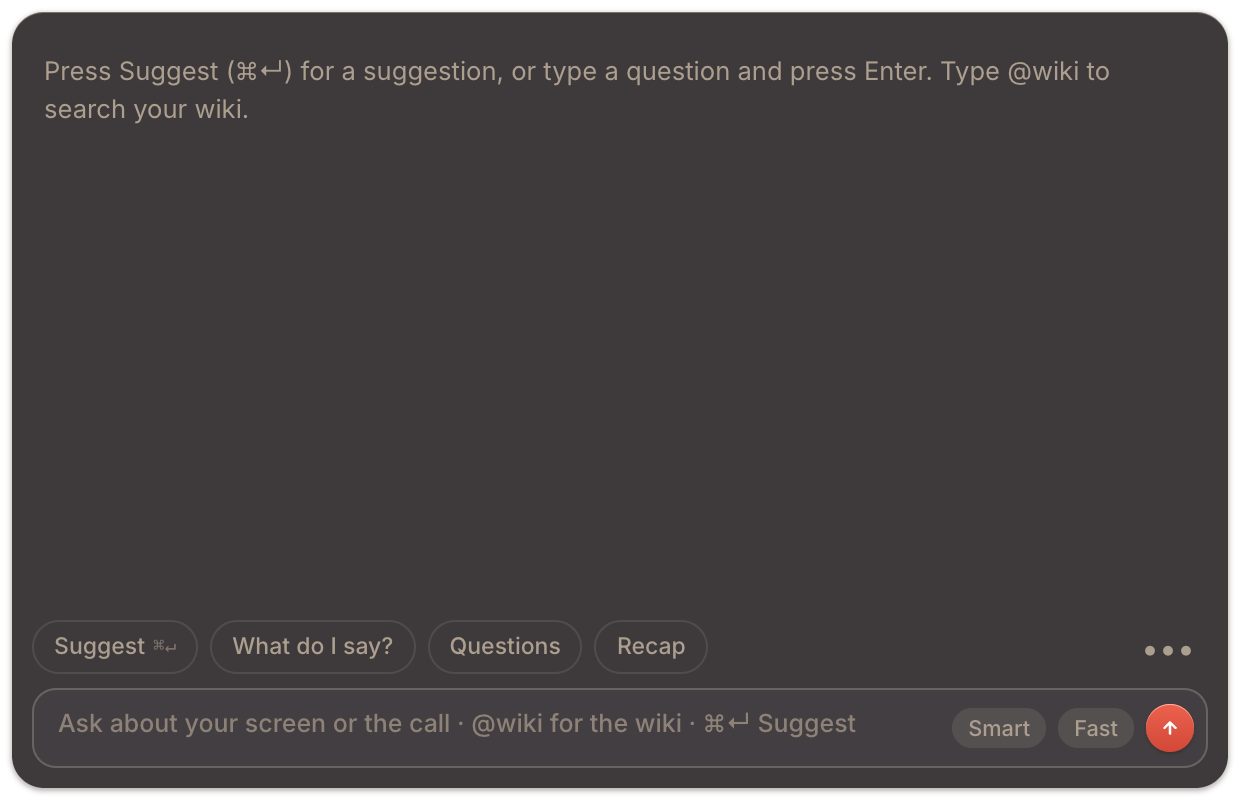
3. During the call
TellPip turns the conversation into text as it happens, thanks to the local model that works right on your computer: your voice through the microphone, the others’ through your computer’s audio. You don’t need to set any language: TellPip recognises the spoken language by itself, among 25 European languages, even if it changes mid-call. If you want to follow the text word by word, turn on Live transcript in the ••• menu.
The audio takes care of itself too: if you plug in or unplug headphones or AirPods mid-call, TellPip follows them automatically, for a transcript that’s always clean.
Ask for help
When someone asks you a question, press Suggest (or ⌘↵) and the answer appears in the chat, built from the conversation, your screen and your documents. You also have What do I say?, Questions and Recap, or you can type your own question in the text field. You’ll find every detail in Ask Pip during a call.
Let Pip answer on its own
With real-time answers on, Pip offers the answer by itself, right when you need it: you don’t have to press anything. Automatic answers are marked Automatic answer. See Real-time answers.
Hide the chat
Press Hide, ⌘\ or Esc. TellPip keeps listening discreetly, and you can reopen the chat in an instant with ⌘\.
Who’s in the call
With client memory on, you can pick the people with Who’s in the call in the ••• menu: Pip reminds you what you discussed last time, with a card that starts Psst… last time with: open commitments, decisions, pending points. See Client memory.
4. End the call
When you’re done, end the session the way you prefer:
- press ⌘⇧\;
- choose End session from the menu-bar icon.
The chat hides and TellPip’s main window opens, right on the session you just ended.
5. Read your notes
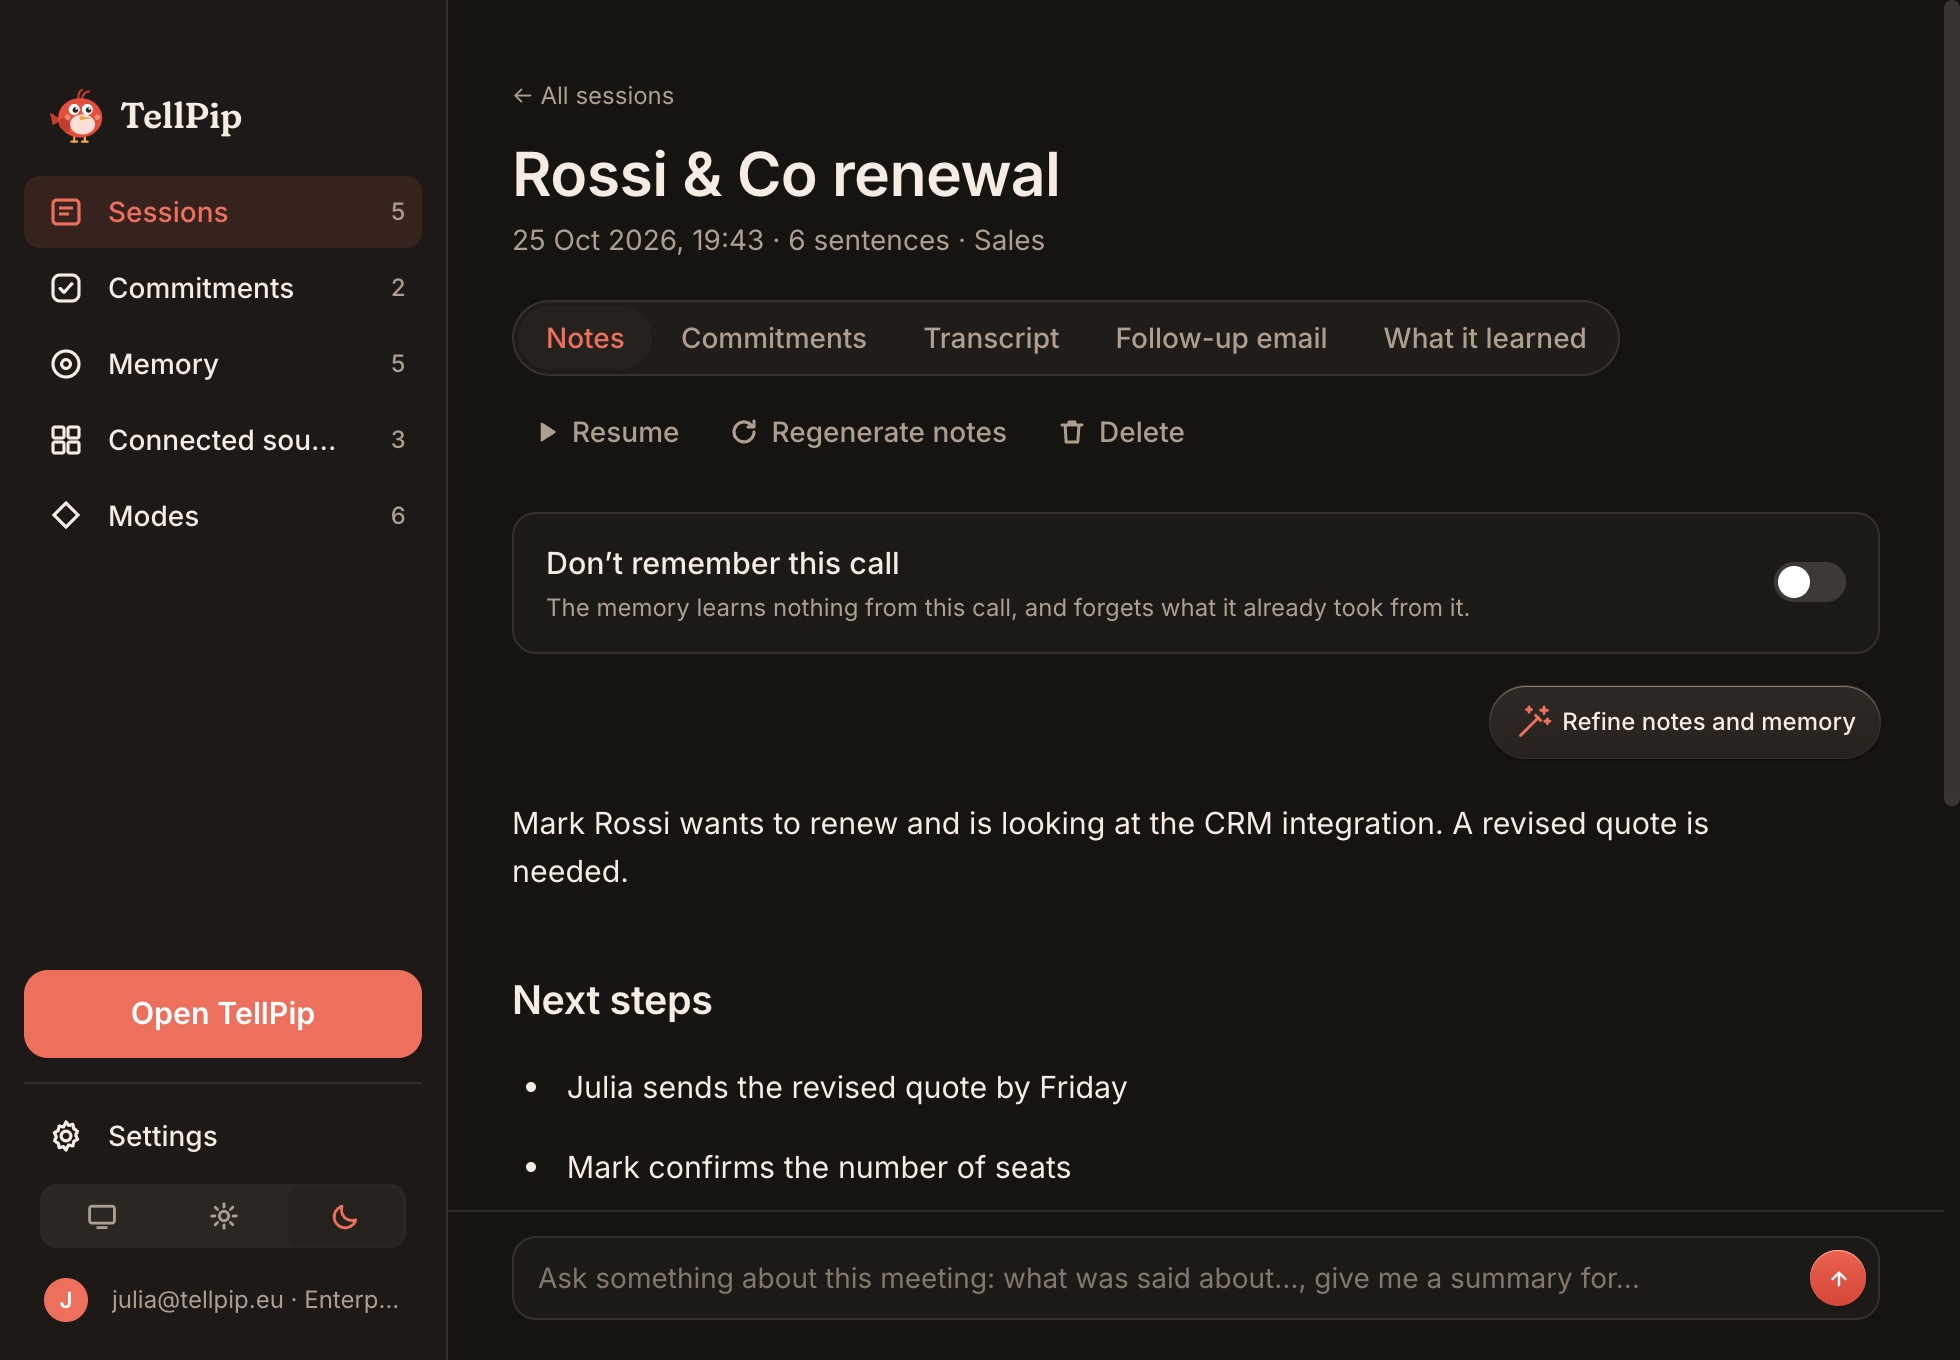
At the end of the call the notes are ready, in your mode’s format. The session gives you three views: Notes, Transcript and Follow-up email. The notes follow the template of the mode you used and close with the list of actions.
From here you can copy the notes in one click, send the follow-up email or ask the session a question. Pip may ask you for a quick confirmation to make the notes and memory even more accurate. Read more in Notes, transcript and follow-up email.
6. For a call that always runs smoothly
- If pressing Psst… doesn’t bring up the chat, check that you’re signed in and that your plan is active. See Always get Pip’s answers.
- To transcribe the other participants’ voices too, TellPip needs the Screen & System Audio Recording permission. If the others’ audio doesn’t come through, TellPip tells you and tries again by itself. See Let Pip hear everyone on the call.
- At first launch, TellPip installs the local transcription model: transcription is available as soon as the installation finishes. See The first-launch download.
Questa guida ti accompagna in una call dall’inizio alla fine: cosa preparare prima, come avviare l’ascolto, come chiedere aiuto a Pip e cosa accade quando la call si conclude. Il procedimento è identico in Zoom, Google Meet, Microsoft Teams, Webex e in qualsiasi altra app, perché TellPip ascolta direttamente dal tuo computer e non entra mai nella riunione: nessun bot, nessun invito, nessun partecipante in più.
1. Prima della call
- Verifica l’accesso. Controlla di aver fatto l’accesso e che la prova gratuita o l’abbonamento siano attivi: è ciò che abilita l’ascolto. Vedi Installa TellPip ed entra.
- Concedi i permessi. Microfono, registrazione schermo e audio di sistema permettono a TellPip di ascoltare te e i tuoi interlocutori. Vedi I permessi di macOS.
- Scegli la modalità giusta. Se hai preparato una modalità per questo tipo di call (una consulenza, una call di vendita, una riunione di team), selezionala dal menu ••• della chat → Modalità. Pip userà le sue istruzioni e i suoi documenti, e le note seguiranno il suo template.
2. Avvia la sessione
TellPip è pronto ad ascoltare non appena lo apri. Entra nella call come fai sempre, poi avvia la sessione nel modo che preferisci:
- premi Psst… sulla barra, oppure ⌘\: la chat si apre e l’ascolto parte;
- premi ⌘⇧\, la scorciatoia che avvia e termina la sessione;
- scegli Avvia sessione dall’icona nella barra dei menu.
Pip ti dà il benvenuto nella chat confermandoti che sta ascoltando e che vede il tuo schermo e la conversazione. Da questo momento sei pronto.
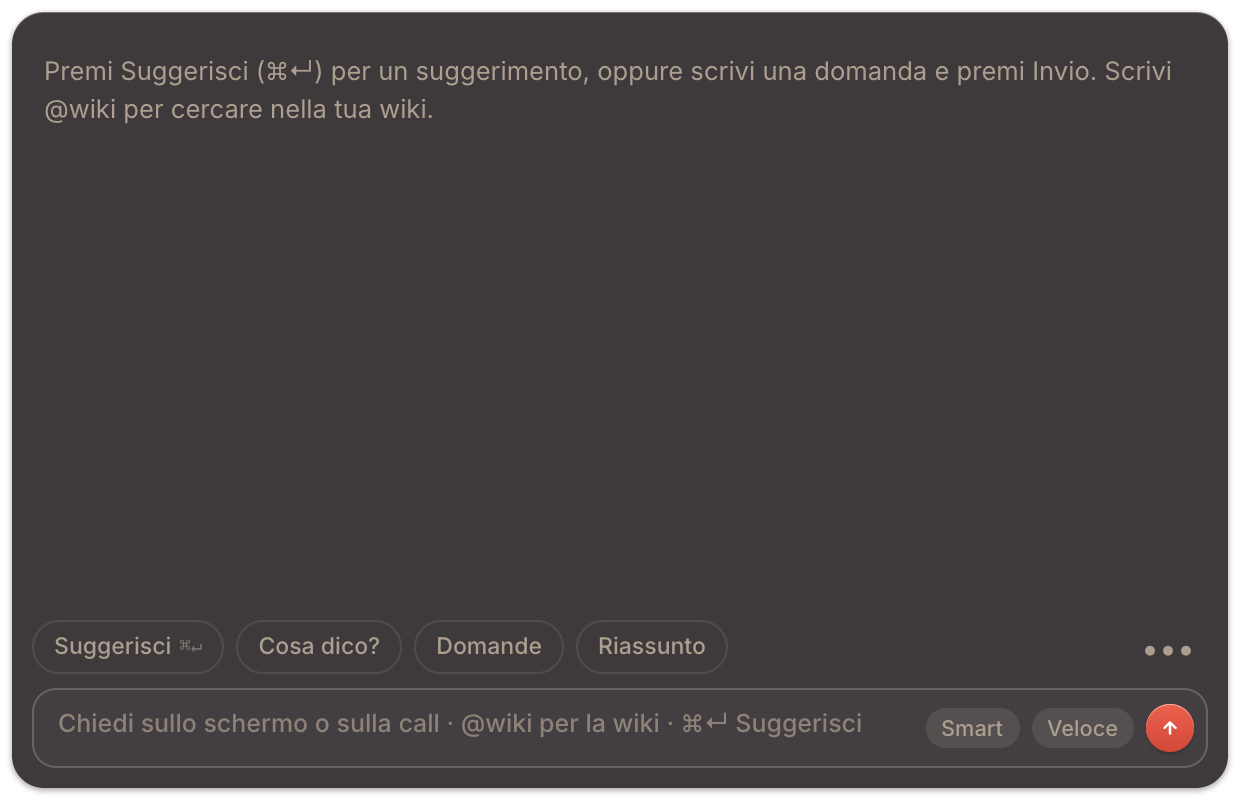
3. Durante la call
TellPip trasforma la conversazione in testo mentre si svolge, grazie al modello locale che lavora direttamente sul tuo computer: la tua voce dal microfono, quella degli altri dall’audio del computer. Non devi impostare nessuna lingua: TellPip riconosce da solo la lingua parlata, tra 25 lingue europee, anche se cambia a metà call. Se vuoi seguire il testo parola per parola, attiva Trascrizione in diretta nel menu •••.
Anche l’audio si gestisce da solo: se colleghi o scolleghi le cuffie o gli AirPods a metà call, TellPip li segue automaticamente, per una trascrizione sempre pulita.
Chiedi aiuto
Quando qualcuno ti rivolge una domanda, premi Suggerisci (o ⌘↵) e la risposta compare nella chat, costruita a partire dalla conversazione, dal tuo schermo e dai tuoi documenti. Hai a disposizione anche Cosa dico?, Domande e Riassunto, oppure puoi scrivere tu la domanda nel campo di testo. Trovi ogni dettaglio in Chiedi a Pip durante una call.
Lascia rispondere Pip da solo
Con le risposte in tempo reale attive, Pip propone la risposta da solo, nel momento in cui ti serve: non devi premere nulla. Le risposte automatiche sono contrassegnate come Risposta automatica. Vedi Risposte in tempo reale.
Nascondi la chat
Premi Nascondi, ⌘\ o Esc. TellPip continua ad ascoltare con discrezione, e riapri la chat in un istante con ⌘\.
Chi c’è in call
Con la memoria dei clienti attiva, puoi indicare le persone con Chi c’è in call nel menu •••: Pip ti ricorda di cosa avete parlato l’ultima volta, con una scheda che inizia con Psst… l’ultima volta con: impegni aperti, decisioni, punti in sospeso. Vedi Memoria dei clienti.
4. Chiudi la call
Quando hai finito, termina la sessione nel modo che preferisci:
- premi ⌘⇧\;
- scegli Termina sessione dall’icona nella barra dei menu.
La chat si nasconde e si apre la finestra principale di TellPip, direttamente sulla sessione appena conclusa.
5. Leggi le note
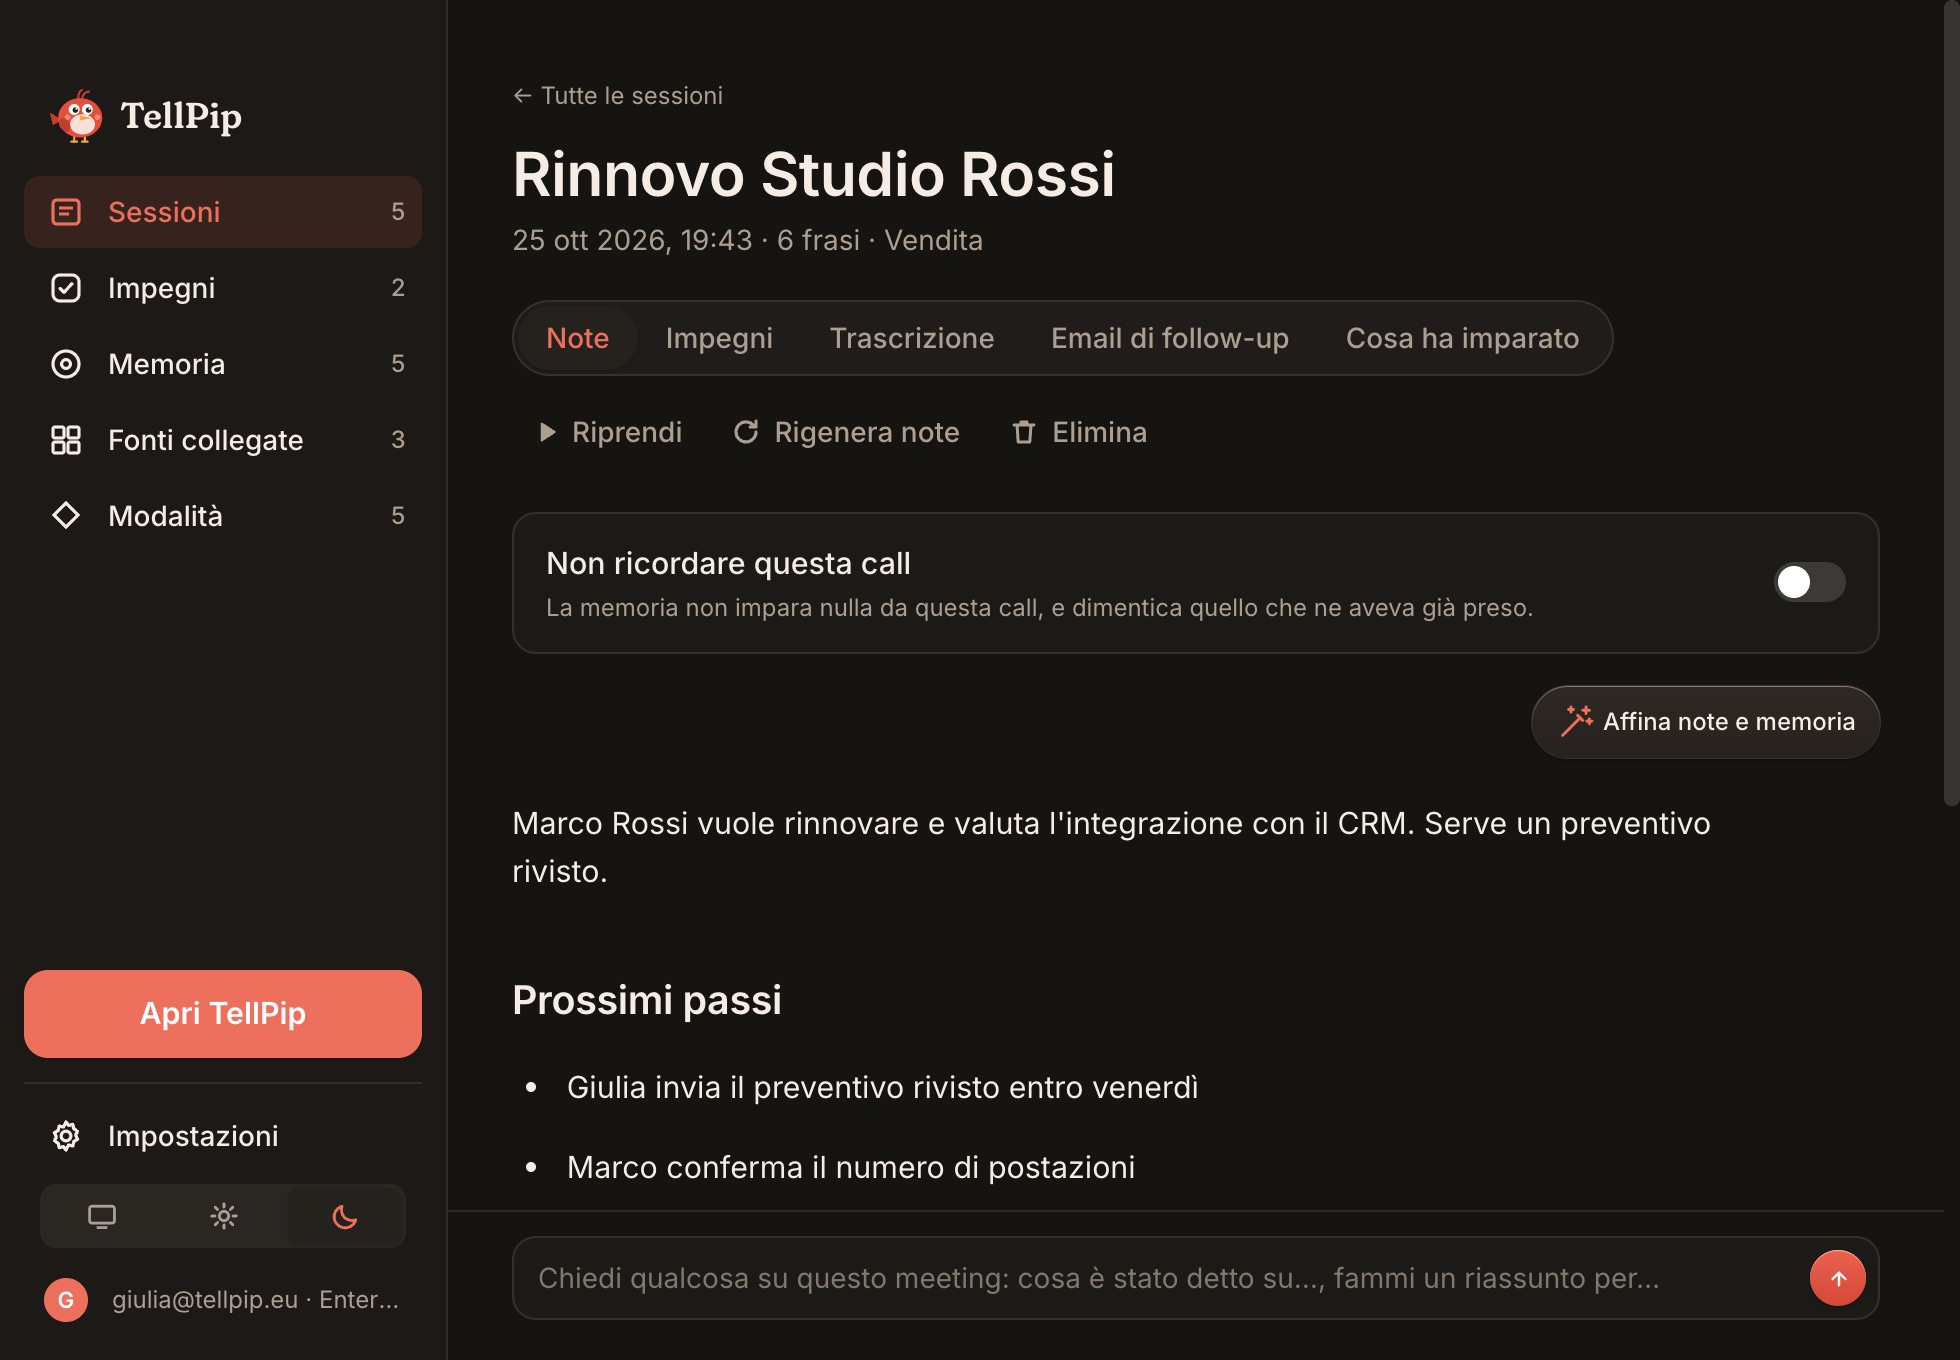
Alla fine della call le note sono pronte, nel formato della tua modalità. La sessione ti offre tre viste: Note, Trascrizione ed Email di follow-up. Le note seguono il template della modalità che hai usato e si chiudono con l’elenco delle azioni.
Da qui puoi copiare le note con un clic, inviare l’email di follow-up o fare una domanda alla sessione. Pip può chiederti una rapida conferma per rendere note e memoria ancora più accurate. Trovi tutto in Note, trascrizione ed email di follow-up.
6. Per una call sempre fluida
- Se premendo Psst… la chat non si attiva, verifica di aver fatto l’accesso e che il piano sia attivo. Vedi Ricevi sempre le risposte di Pip.
- Per trascrivere anche la voce degli altri partecipanti, TellPip ha bisogno del permesso Registrazione schermo e audio di sistema. Se l’audio degli altri non arriva, TellPip te lo segnala e riprova da solo. Vedi Fai sentire a Pip tutti i partecipanti.
- Al primo avvio, TellPip installa il modello locale per la trascrizione: la trascrizione è disponibile non appena l’installazione si completa. Vedi Il download al primo avvio.
Related articles
Need anything else? We’re here for you.
Write to us